When files are deleted from your hard drive, they are first placed in the Recycle Bin, which gives you a chance to restore them. But if you have emptied the Recycle Bin and then realize that it contained an important file, , you will need a special tool to help you get it back.
The following are the steps to restore your lost files:
1. Install OSForensics
Download OSForensics from http://www.osforensics.com, Click “Next” followed by “Install and wait for the installation to complete.

2. Getting Started
When the program launches, click the Continue Using Free Version” button and you are ready to get started.

3. Find lost files
To start the process of looking for files that could be recovered, click “Deleted Files” Search button in the left hand list in the right hand side of the program window, click the Disk drop down menu and select the hard drive o partition you would like to use to search for lost files.

4. Configure Search Options
It’s possible to just click the “Search” button and start to search for any files that could be recovered. However, you can be more specific by clicking the “Config” button. For example, if you know the size of the file you are looking for you can enter the numbers in the MIn and Max boxes before clicking “Ok”.

5. Filtering your searches
You can also limit your search results by entering specific keywords in the Filter String box. For example, if you want to search for all jpg images type *.jpg. If you want to search for documents that include the word “dog” in their title, you can simply enter this word in the same box.

6. Performing your search
When you have set any options you would like to use, click the “search” button. If multiple files are found, you may not know which is the one you are looking for, just do a right-click on one of the files on the list and select “View with internal Viewer” for a preview.

7. Restoring found files
When you have found the file you want, right click it and select “Save deleted file”. It’s better to save this file to a hard drive or partition other than the one it was originally stored on to avoid overwriting other recoverable files.

8. Retracing your activities
Whether you have been conducting online research or creating a document, it’s easy to forget where you stored a file or
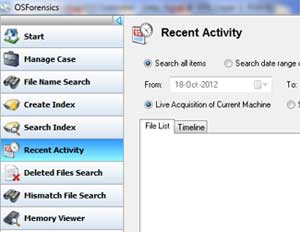
what web sites you visited. To help you refresh your memory you can use this program to view a log of files that have been edited and websites that have been visited. Start by clicking the “Recent Activity” button.

9. View computing history

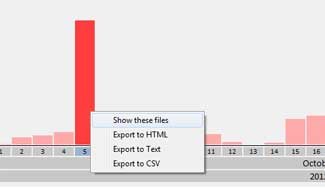
To see your history , ensure that the “Search all items” option is selected and click the “Scan” button to the right. Once the scan is complete, move to the Timeline tab, click the year , month and day you would like to view activity for, then do a right-click on a bar for the time of day and select “Show these files”.
OS Forensics is not only a great tool to find files that you accidentally deleted from your computer, but also you can use it to find that web site you visited a while ago and you can’t remember the name. This is a valuable tool that can save you lots of time.
The content on this blog is a summary of the article “Learn How to Recover Lost Files”,
from “Windows: The Official Magazine“


